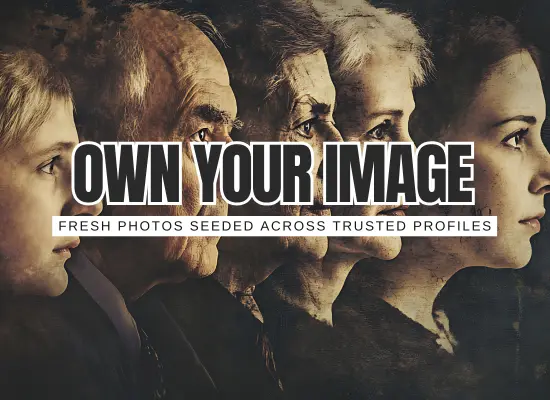
Your image results are often the first impression. If the grid shows old event shots, blurry selfies, or someone else with your name, people decide in seconds. The plan below gives you nine practical fixes that replace random photos with accurate, up-to-date images that actually represent you.
Your image results are often the first impression. If the grid shows old event shots, blurry selfies, or someone else with your name, people decide in seconds. The plan below gives you nine practical fixes that replace random photos with accurate, up to date images that actually represent you.
A plain plan for reshaping the Google Images grid for your name. You will create a small, curated photo kit, publish it correctly, and send clear signals with filenames, captions, and structured data. The goal is simple. Replace noise with accurate, fresh visuals.
- Get 6 to 12 authoritative photos indexed
- Own the top two rows for your name
- Keep everything dated and captioned
Nine image fixes that move the needle
Publish one page on your site with 6 to 12 approved photos. Mix headshots, context shots, and one hero image. Give each file a descriptive name that includes your full name, location or event, and month year.
firstname-lastname-headshot-city-2025-03.jpg • firstname-lastname-speaking-event-2025-05.jpg
Under every image add a one sentence caption with who, where, and when. Use alt text that matches the photo and includes your name once. Do not stuff keywords. Keep it natural and specific.
“Chris Martin speaking at Gulf Maritime Forum in Houston, April 2025.”
“Best maritime leader speaker businessman entrepreneur success.”
Use IPTC fields to embed your name, caption, creator, copyright, and date inside the file before upload. Many editors support this. It helps keep attribution consistent across the web.
- Title and Description
- Creator and Copyright
- Location and Date Created
- Keywords for your name and event
Provide a clean mix that works in grids and cards. Aim for at least 1200 pixels on the long side for hero images and 800 to 1200 for the rest. Keep faces centered and avoid tight crops that clip hair or shoulders.
Mark up your photo kit page with Person schema that references your images. Also include the images in your XML image sitemap. This helps search systems understand which files represent you.
Keep file URLs stable. Do not rename or move them every redesign.
Place images on your Bio, Q and A, Timeline, and Project pages. Link to the photo kit from each. This clusters strong signals around your name and pushes the right files into circulation.
- Bio with primary headshot
- Q and A with context photo
- Timeline with dated photo
- Project gallery tiles
If an image no longer represents you, publish a newer photo with a clear caption and date. Link to it from recent posts so it gains visibility. Over time the grid tilts toward your current look and roles.
Uploading new photos without captions or dates. Search systems and readers cannot tell what is current.
Update the same headshot and one context photo on your strongest profiles. Use matching filenames and similar captions. Think LinkedIn, speaker bios, company leadership, and major directories you control.
- Use the same primary headshot
- Keep your name spelling identical across sites
- Add location or event in captions where relevant
If an image is harmful or private, contact the host with a short, factual note. Where policy allows, request removal. If removal is not realistic, publish accurate photos and captions that compete directly.
Your 12 photo kit planner
| Slot | Purpose | Filename pattern | Caption essentials |
|---|---|---|---|
| 1 | Primary headshot | name-headshot-city-YYYY-MM.jpg | Name, city, month year |
| 2 | Alternate headshot | name-headshot-profile-YYYY-MM.jpg | Different angle for socials |
| 3 | Speaking hero | name-speaking-event-YYYY-MM.jpg | Event name and city |
| 4 | Working context | name-on-site-role-YYYY-MM.jpg | What you are doing |
| 5 | Team shot | name-team-city-YYYY-MM.jpg | Names of key people |
| 6 | Award or press | name-award-publication-YYYY-MM.jpg | Award or outlet name |
| 7 | Product or output | name-product-demo-YYYY-MM.jpg | What is shown and where |
| 8 | Community or mentoring | name-mentoring-city-YYYY-MM.jpg | Group name and date |
| 9 | Lifestyle but relevant | name-outdoors-city-YYYY-MM.jpg | Keep it professional |
| 10 | Legacy replacement | name-updated-look-YYYY-MM.jpg | Explain the change |
| 11 | Local press headshot | name-press-kit-YYYY-MM.jpg | Note usage terms |
| 12 | Spare slot | name-extra-YYYY-MM.jpg | Fill as needed |
Simple coverage gauge
Tick what you have today. This gives a quick sense of how ready you are to shift the grid.
Seven day rollout
- Day 1 Collect 12 photos. Rename with the recipe. Add IPTC data.
- Day 2 Publish the photo kit page with captions and dates.
- Day 3 Add Person schema and include images in your sitemap.
- Day 4 Update Bio, Q and A, Timeline, and Project pages with select images.
- Day 5 Update your top profiles with the same headshot and one context photo.
- Day 6 Link two recent posts to the photo kit. Keep URLs stable.
- Day 7 Recheck image results. Note which new files appear. Fill gaps next week.
Do this and avoid that
| Do | Avoid |
|---|---|
| Use descriptive filenames and captions | Random camera names like IMG_3456.jpg |
| Post on pages that rank for your name | Burying images on thin or hidden pages |
| Keep dates visible and consistent | Uploading with no dates or context |
| Recheck the grid monthly | Letting old event photos define you |
Image results shift when you publish a small set of accurate, dated photos in the right places and keep the details consistent. Start with a 12 photo kit and clear captions, then connect those images to pages that already rank for your name. Over the next few weeks the grid updates and your visual first impression improves.